

Ӧ�ð汾v1.0.939743211 ����
Ӧ������������
Ӧ�ô�С4.8M
����ʱ��2026-07-15 14:57
Ӧ���Ǽ�
�����Android
�ٷ���ַhttps://deepmind.google/models/gemini/
Ӧ�ó���Google LLC
�������������Ҫ��ѧ��������ʹ�õģ�����ʹ��ourplay���������
���°汾������־
ʹ��Gemini 3.5Flash��Gemini Omni��������Ч����������硣
• Gemini Sparkȫ������ AI�����������������������ɼ�Ԧ�������
• Daily Brief����Ϊ���ṩ���Ի��ij����������������һ���������Ϣ��
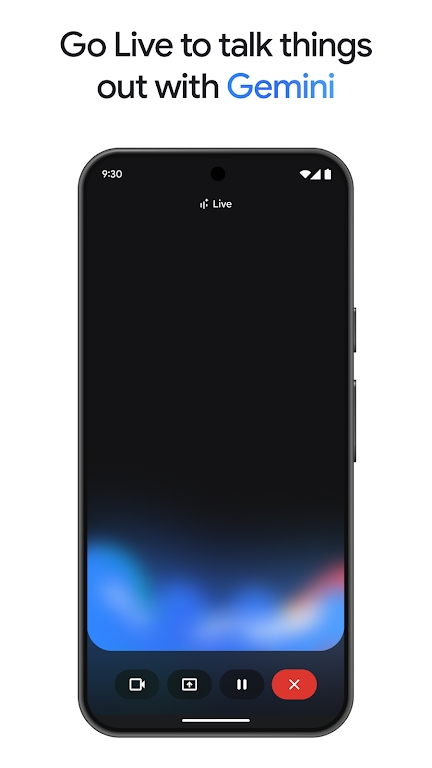
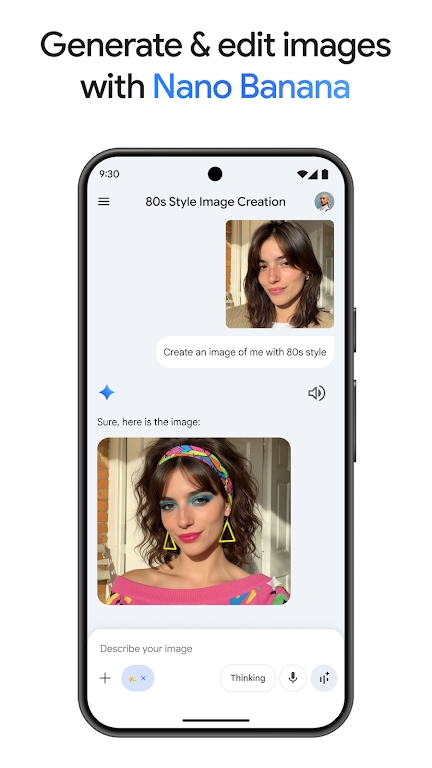
• ��Gemini Live�У���������Geminiչʾ�������������ݣ�������˵��������������ʹ��Nano Banana��˼�����������ȫ�»�����
��gemini�ٷ����ء��ǹȸ�������˾���µ�AI��ģ������������ӵ��ȫ�����Ƚ����˹������㷨�������û��ճ�ѧϰ�����еĶ��������������Զ����һ��ģ�ͣ����������������ͼ��㷽����־��ˣ��ʺϹ����ⲻͬ�û�Ⱥ��ʹ�ã���Ҫ�Ļ�ӭ������վ��װ���顣

����Google���µ�AI����Gemini����ȡ������У���������Ч�ʣ�����Ϊֹ�����ܵ�ģ�͡�ӵ�����Ƚ����������ܣ��ɰ�����ѧϰ�������滮�κ����
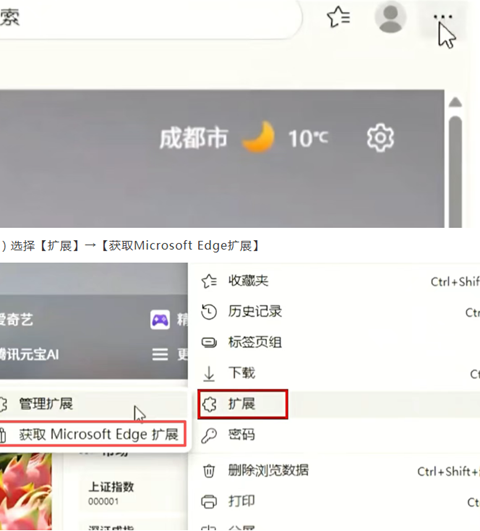
1����Edge�������������ϽDz˵��������㣩
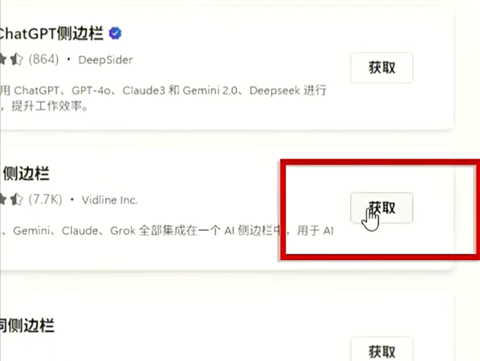
3�����������롾sider�����س�

4���ڽ�����ҵ���Sider:ChatGPT�������������������֣�

5���������ȡ������������չ��
1����װ�ɹ�������չ����Siderͼ��
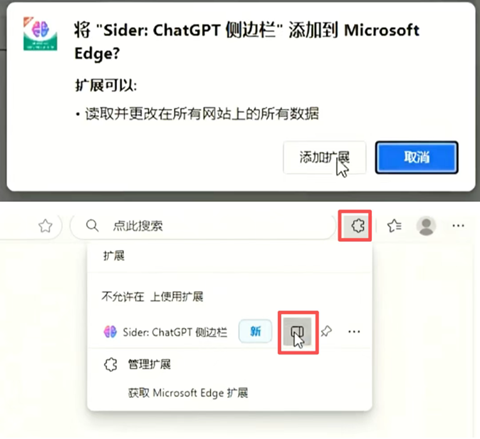
2���ڲ���������»��ҵ����л�ģ�͡���ť
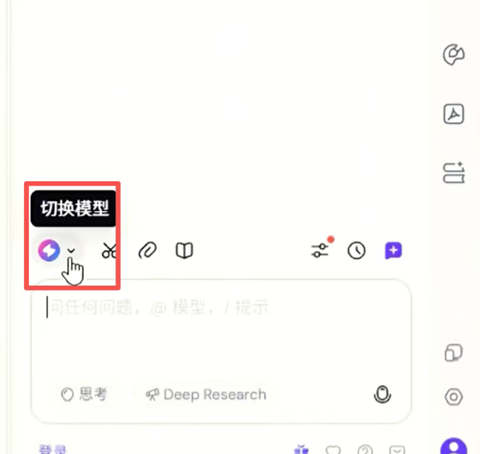
3����ģ���б�ѡ��Gemini 3 Pro��
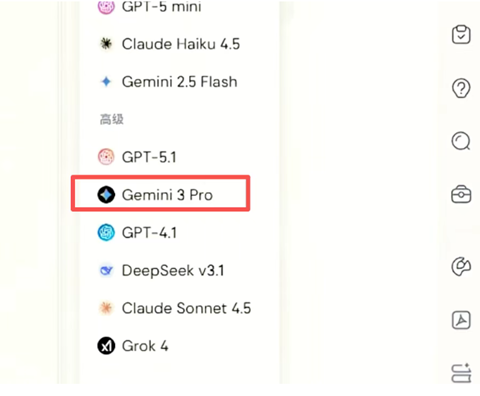
4�����ɿ�ʼ���ʹ�ø�ģ�ͽ���AI�ʴ�
��ʹ��Edge������й���
�״ΰ�װ�����ֶ����ò����
ģ���л�����λ�ڲ�����ײ�

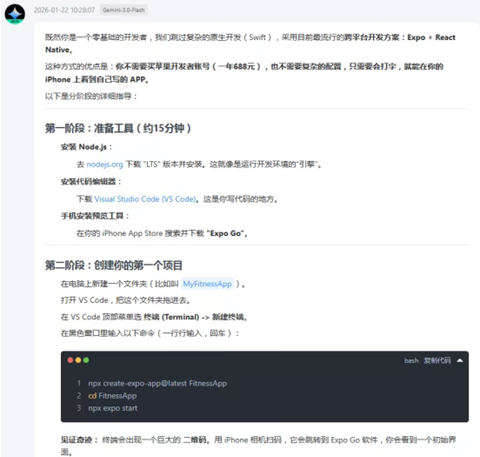
��Ȼ����һ��������Ŀ����ߣ������������ӵ�ԭ��������Swift��������Ŀǰ�����е�**��ƽ̨����������Expo +React Native**��
���ַ�ʽ���ŵ��ǣ�**�㲻��Ҫ��ƻ���������˺ţ�һ��688Ԫ����Ҳ����Ҫ���ӵ����ã�ֻ��Ҫ����֣����������iPhone�Ͽ����Լ�д��APP��**
�����Ƿֽε���ϸָ����
1. **��װNode.js**��
* ȥ[nodejs.org](https://nodejs.org/)����"LTS"�汾����װ������������п��������ġ����桱��
2. **��װ����༭��**��
* ����[Visual Studio Code (VS Code)](https://code.visualstudio.com/)��������д����ĵط���
3. **�ֻ���װԤ������**��
* �����iPhone App Store����������**"Expo Go"**��
---
1.�ڵ������½�һ���ļ��У������`MyFitnessApp`����
2.��VS Code��������ļ����Ͻ�ȥ��
3.��VS Code�����˵�ѡ**�ն�(Terminal) ->�½��ն�**��
4.�ں�ɫ�����������������һ�������룬�س�����
```bash
npx create-expo-app@latest FitnessApp
cd FitnessApp��
npx expo start��
```
5. **��֤�漣��**�ն˻����һ�����**��ά��**����iPhone���ɨ�룬������ת��Expo Go��������ῴ��һ����ʼ���档
1.��VS Code����ҵ�`App.js`��`index.js`��
2.�����������ȫ��ɾ����ճ����Ϊ������**��React Native����**�����·�����
3. **��װ��Ҫ�IJ��**�����ն����룺
```bash
npx expo install lucide-react-native react-native-reanimated react-native-svg
```
####ճ����δ��뵽App.js��
*(����ר��Ϊ�ֻ��Ż��İ汾)*
```jsx
import React, { useState, useEffect } from 'react';
import { StyleSheet, Text, View, TouchableOpacity, Dimensions, SafeAreaView } from 'react-native';
import { Dumbbell, Camera, Play, CheckCircle } from 'lucide-react-native';
import Animated, { useSharedValue, useAnimatedStyle, withRepeat, withTiming, withSequence } from 'react-native-reanimated';
const { width } = Dimensions.get('window');
export default function App() {
const [isStarted, setIsStarted] = useState(false);
const [isPresent, setIsPresent] = useState(true);
const [timer, setTimer] = useState(0);
//������
const animalY = useSharedValue(0);
const animalScale = useSharedValue(1);
useEffect(() => {
let interval;
if (isStarted && isPresent) {
//ģ�⽡����������
animalY.value = withRepeat(withTiming(-20, { duration: 400 }), -1, true);
animalScale.value = withRepeat(withTiming(1.1, { duration: 400 }), -1, true);
interval = setInterval(() => setTimer(t => t + 1), 1000);
} else {
animalY.value = withTiming(0);
animalScale.value = withTiming(1);
clearInterval(interval);
}
return () => clearInterval(interval);
}, [isStarted, isPresent]);
const animatedStyle = useAnimatedStyle(() => ({
transform: [{ translateY: animalY.value }, { scale: animalScale.value }],
}));
return (
<SafeAreaView style={styles.container}>
{/*״̬��*/}
<View style={styles.header}>
<View style={[styles.aiTag, { backgroundColor: isPresent ? '#10b981' : '#ef4444' }]}>
<Camera color="white" size={16} />
<Text style={styles.aiText}>{isPresent ? "AI:רע��" : "AI:�뿪"}</Text>
</View>
<Text style={styles.timerText}>{Math.floor(timer/60)}:{(timer%60).toString().padStart(2,'0')}</Text>
</View>
{/*������̨*/}
<View style={styles.stage}>
<Animated.Text style={[styles.animal, animatedStyle]}>
{isPresent ? "��" : "��"}
</Animated.Text>
<View style={styles.shadow} />
<Text style={styles.actionText}>
{isStarted ? (isPresent ? "���ڷ��ߣ��..." : "�������ˣ�����˯��") : "���ÿ�ʼ����"}
</Text>
</View>
{/*������*/}
<View style={styles.controls}>
{!isStarted ? (
<TouchableOpacity style={styles.startBtn} onPress={() => setIsStarted(true)}>
<Play color="white" fill="white" />
<Text style={styles.btnText}>��ʼרע</Text>
</TouchableOpacity>
) : (
<View style={{ flexDirection: 'row', gap: 10 }}>
<TouchableOpacity style={styles.simBtn} onPress={() => setIsPresent(!isPresent)}>
<Text style={styles.simText}>{isPresent ? "ģ���뿪" : "ģ�����"}</Text>
</TouchableOpacity>
<TouchableOpacity style={styles.endBtn} onPress={() => {setIsStarted(false); setTimer(0)}}>
<CheckCircle color="#10b981" />
<Text style={[styles.btnText, {color: '#10b981'}]}>���</Text>
</TouchableOpacity>
</View>
)}
</View>
</SafeAreaView>
);
}
const styles = StyleSheet.create({
container: { flex: 1, backgroundColor: '#0f172a', alignItems: 'center' },
header: { width: '90%', flexDirection: 'row', justifyContent: 'space-between', marginTop: 20 },
aiTag: { flexDirection: 'row', alignItems: 'center', paddingHorizontal: 12, paddingVertical: 6, borderRadius: 20, gap: 6 },
aiText: { color: 'white', fontSize: 12, fontWeight: 'bold' },
timerText: { color: '#10b981', fontSize: 32, fontWeight: '900' },
stage: { width: width * 0.85, aspectRatio: 1, backgroundColor: '#1e293b', borderRadius: 40, marginTop: 40, justifyContent: 'center', alignItems: 'center', borderWidth: 4, borderColor: '#334155' },
animal: { fontSize: 100 },
shadow: { width: 80, height: 10, backgroundColor: 'rgba(0,0,0,0.3)', borderRadius: 20, marginTop: 10 },
actionText: { color: '#94a3b8', marginTop: 30, fontSize: 18, fontWeight: 'bold' },
controls: { width: '90%', marginTop: 'auto', marginBottom: 40 },
startBtn: { backgroundColor: '#10b981', flexDirection: 'row', height: 60, borderRadius: 20, justifyContent: 'center', alignItems: 'center', gap: 10 },
endBtn: { flex: 1, backgroundColor: 'white', flexDirection: 'row', height: 60, borderRadius: 20, justifyContent: 'center', alignItems: 'center', gap: 10 },
simBtn: { flex: 1, backgroundColor: '#334155', height: 60, borderRadius: 20, justifyContent: 'center', alignItems: 'center' },
btnText: { color: 'white', fontSize: 18, fontWeight: 'bold' },
simText: { color: '#cbd5e1', fontSize: 16 }
});
```
��Ϊ�������ֱ��дAI�㷨���ѡ�������Է������ߣ�
1. **��һ������ǰ�Σ�**��ʹ������ġ�ģ�ⰴť������������
2. **�ڶ��������ף�**������**TensorFlow.js**��
* ����Ҫѧϰ��ε����ֻ�����ͷ��
* ʹ��һ����`posenet`��Ԥѵ��ģ�͡���������㻭�����м����ˡ�
* ���`personCount > 0`��������`isPresent(true)`��
����Դ������������ԣ�
1. **����Ԥ��**��ֻҪ��ĵ��Կ��ţ�Expo Go�Ϳ���һֱ���С�
2. **�����װ**��
* ����Ҫע��һ��ƻ���������˺ţ�$99/�꣩��
* ���ն�����`eas build -p ios`��
* Expo�ķ�����������ƶ˴����һ��`.ipa`�ļ���
* ͨ��ƻ���ٷ���**TestFlight**���߰�װ���ֻ��ϡ�
###����Ľ��飺
* **��Ҫ�±���**����������������һ�����Ŷ��ᱨ�������ն���ĺ��֣�ͨ�������������һ�г����ˡ�
* **����AI**������ѱ�����Ϣֱ�Ӷ���ChatGPT��������Ϊʲô�ҵ�Expo��Ŀ�����ˣ���
* **����ͨ��������**������è����������ȥ�о���ô���ɱ�ɫ����
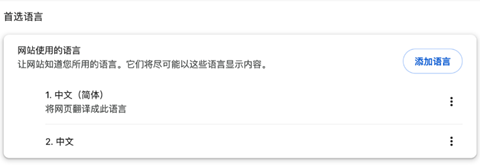
�����ϰ��Ӣ�Ľ��棬������Chrome��������Ͻǵ���������㡹ͼ��->Settings�����ã�->���Languages�����ԣ�������ѡ������Ϊ���������ġ�������Gemini�Ľ���Ҳ���Զ�������ģ��dz����㡣
Gemini 3�ǹȸ�Gemini����˹�����ģ�͵ĵ������汾����Gemini�ǰ汾������ϵ��������˵��
Gemini�ǹȸ��Ƴ����콢�˹�����ģ��ϵ�У�ּ��ʵ��ԭ����ģ̬�������ı���ͼ����Ƶ����Ƶ�ȣ�������������������������Դ��ϣ���������е�˫�����������Ŷ�Эͬ�뼼���ںϡ�
Gemini 3�Ǹ�ϵ�е����°汾������2025��11�·���������������������ģ̬���⡢�������Ĵ�����������Э���ȷ������ǰ���������������������롰Deep Think����������ܹ���֧��100��token�������Ĵ��ڣ��Լ���ǿ�Ĵ������ɺ�����ִ��������
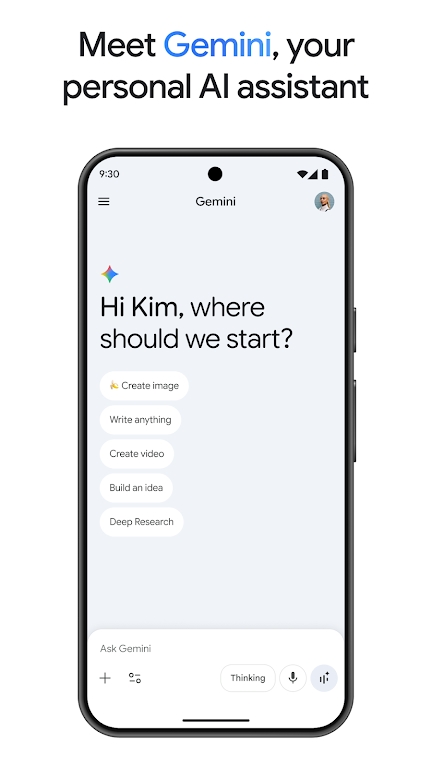
ͨ��Gemini����������ֻ���ֱ��ʹ��Google��һϵ��ǿ�� AI ģ�ͣ��������¹��ܺ����飺
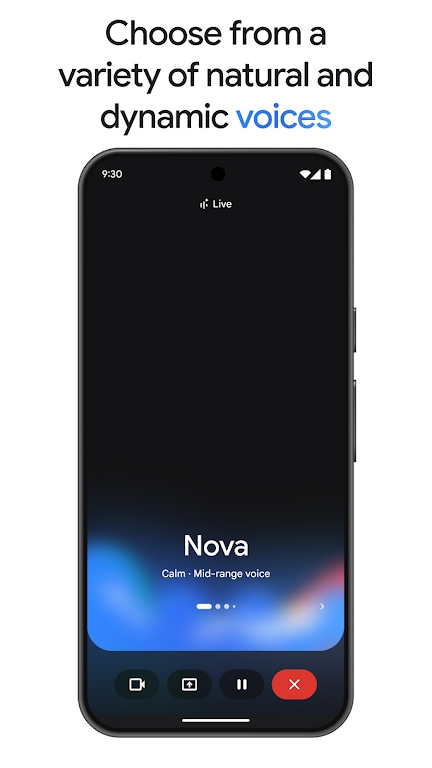
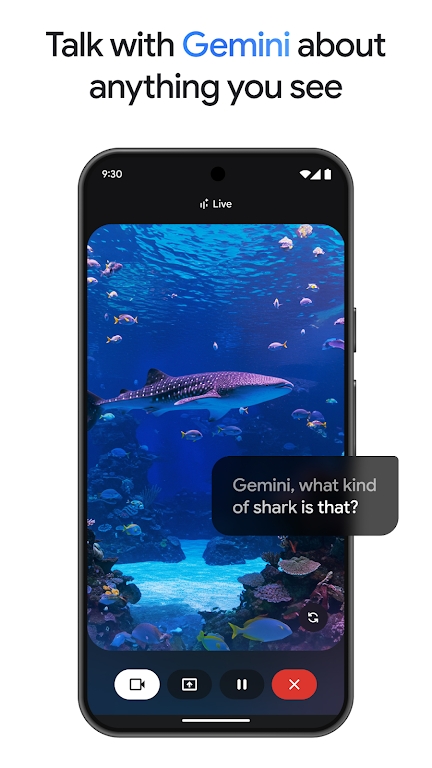
- ��Gemini ʵʱ�����Ի�����չͷ�Է籩�������������⣬�Լ�Ϊ��Ҫʱ����������Gemini Live�Ի��й�������ͷ����Ļ���棬��Gemini��������ǰ������ֻ����GeminiӦ���е㰴��Gemini Live����ť����
- ʹ�û������ܣ�������뷨��Ϊ��ʵ������ʾ��ԭ�ͣ���������Ӧ�á���Ϸ����ҳ����Ϣͼ����Ƶ�����ȡ�
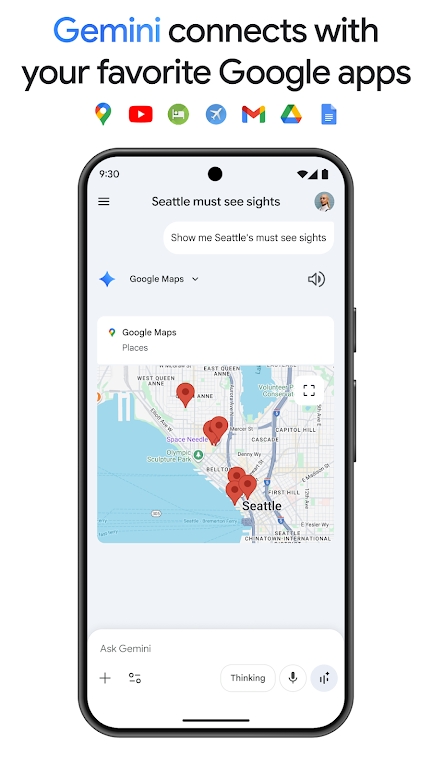
- ������ϲ����GoogleӦ�ã�����Google������YouTube��Google��ͼ��Gmail��
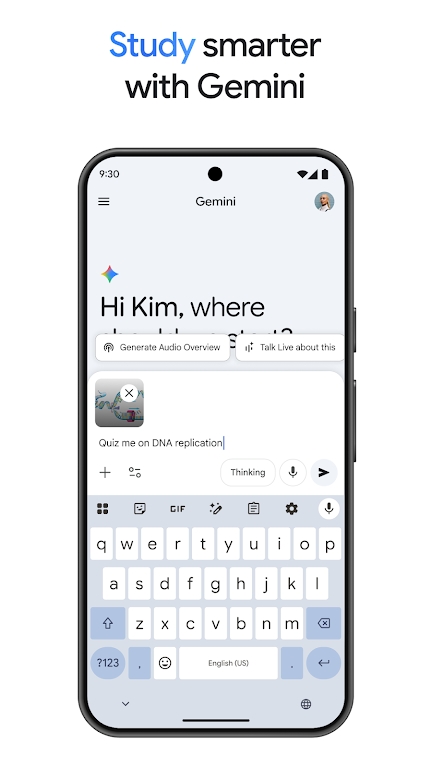
- ��������ͳ��Ͽ�����������ʽͼʾ��ʵ�����Ը���Ч�ķ�ʽѧϰ֪ʶ������̽���κ�����
- �������ļ�ת���ɲ��ͣ���ʱ�������
- ֻ�����������������ɺͱ༭Ч������ͼƬ
- ������õع滮�г�
- ��ȡ����ժҪ����Ƚ�������Դ���ӣ�һվ���ɸ㶨
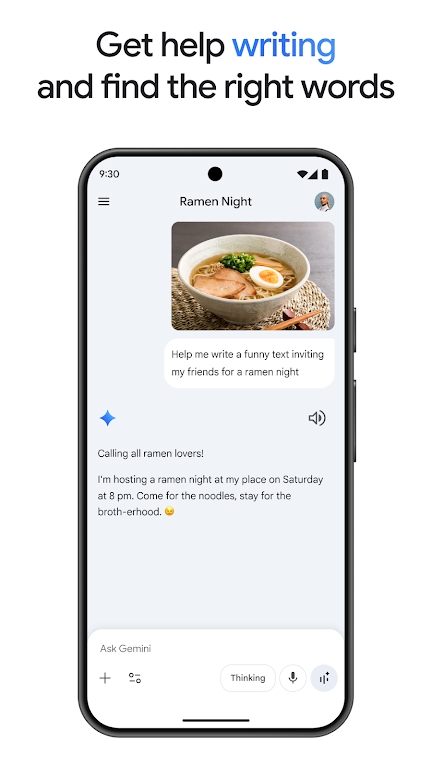
- ���ɹ�˼ȫ�µ��ӣ������������д���
����NanoBanana������Gemini2.5Flash�������Ƚ�ͼƬ���ɺ���ģ��������Pro�����������GeminiӦ������ȫ��Ծ�������ɴ��������������Ŀ��
��������ҵ���100��token�����Ĵ��ڣ��ܹ����ݴ������1,500ҳ�ı���3���д��롣
���⣬�㻹���Ը����ĵ�ʹ��Google��ǿ���ģ��2.5Pro��������2.5Pro������DeepResearch���Լ�Veo3.1Fast��Ƶ���ɹ���
Google AI Pro��Gemini����GoogleAIPro�Ķ���ר�����ĸ�����
��ΪGoogle AI Pro���ĵ�һ���֣�GeminiӦ�ý������������������GoogleWorkspace�����ͽ�����ͻ��ṩ��

geminiAssist����GeminiWebView�ͻ�������v1.1 ����
ϵͳ���� / 805KB / 2026-07-06Gemini3.5Pro�ٷ��������°�����v1.0.939743211 �ֻ���
������� / 4.8M / 2026-07-15Gemini 3.5 Flash�ٷ��������°�����v1.0.939743211 ����
������� / 4.8M / 2026-07-15
gemini 3.1pro�����������v1.0.939743211 ����
������� / 4.8M / 2026-07-15 2026/7/22 17:03:462026/7/22 17:03:46
 2026/7/22 17:03:452026/7/22 17:03:442026/7/21 17:06:192026/7/21 17:06:182026/7/21 17:06:182026/7/21 17:06:172026/7/21 17:05:532026/7/21 17:05:46
grok�ֻ������°汾����v1.2.10-release.01 ����Ѱ�
������� / 44.3M / 2026-07-18
apkpure�ٷ����ذ�װv3.20.7602 ����
������� / 25.2M / 2026-07-22
JVS Claw�����ֻ���v1.0.2 ���°汾
������� / 145.2M / 2026-07-16
̨������3.4.2�ϰ汾����v3.4.2 ����
������� / 246.3M / 2026-07-11
mapchart�ٷ���������v6.8.2 ��������°�
������� / 69.0M / 2026-07-10
��ΪӦ���г��ɰ汾Ӧ������v16.5.1.300 ����
������� / 57.2M / 2026-07-09
�й��ƶ��ƿ����ֻ���(�ƿ�AI)v2.0.6���°�
 ������� / 95.0M / 2024-03-11
vneid��Ѱ�װ���İ�v2.2.10 ����
������� / 96.2M / 2026-07-13
Myid apk update app2026����v1.0.96 ����
������� / 73.9M / 2026-04-13
��èУapp�ٷ����ֻ���v2.0.3���°�
������� / 32.8M / 2023-09-25


ѡ��ͷ��